This Butterfinger Balls recipe is the perfect solution for a fast, no-bake dessert that’s ideal for any occasion. Combining the irresistible crunch of Butterfinger candy bars with creamy peanut butter and a rich chocolate coating, these bite-sized treats are a guaranteed crowd-pleaser. Whether you’re hosting a party, preparing for the holidays, or just need a fun snack, this recipe is as easy as it is delicious.
With just a few simple ingredients and minimal effort, you’ll have a dessert that’s both versatile and indulgent. Plus, it’s a great project to make with kids since no baking is required.
Ready to whip up some sweet magic? Let’s dive in!
Key Takeaways
- Easy Preparation: Butterfinger Balls require minimal effort and no baking, making them a convenient choice for both novice and experienced cooks.
- Quick Chill Time: The mixture sets in just 30 minutes, meaning you can whip these up on short notice.
- Versatile Dessert: Customize this recipe by experimenting with different candy bars, coatings, or decorative toppings.
- Crowd-Pleaser: These sweet, chocolate-coated balls are ideal for parties, holidays, or as thoughtful homemade gifts.
- Freezer-Friendly: Make them ahead of time and freeze for up to six months, perfect for last-minute treats or unexpected guests.
These features make Butterfinger Balls an irresistible addition to any dessert menu!
Why You’ll Love This Recipe
Butterfinger Balls mix a crispy crunch with creamy smoothness, creating the perfect balance of flavor and texture. These bite-sized treats can be made in large batches, making them an excellent choice for entertaining or holiday gatherings. Their rich taste and attractive appearance ensure they stand out on any dessert table.
If you enjoy working with your hands in the kitchen, this recipe is a joy to make. Shaping and dipping each ball feels satisfying and creative, especially when experimenting with decorations like sprinkles or drizzle.
Moreover, the ingredients are simple and budget-friendly, often already available in your pantry. This makes Butterfinger Balls an affordable way to impress guests or treat your family.
Best of all, they’re kid-friendly—not just to eat but to prepare! Little ones will love helping with tasks like crushing candy or rolling the mixture into balls.
Ingredients You’ll Need for the Recipe for Butterfinger Balls

This recipe only needs a few basic ingredients. Each component plays a key role in the flavor and texture of the Butterfinger Balls:
| Ingredient | Quantity | Notes |
|---|---|---|
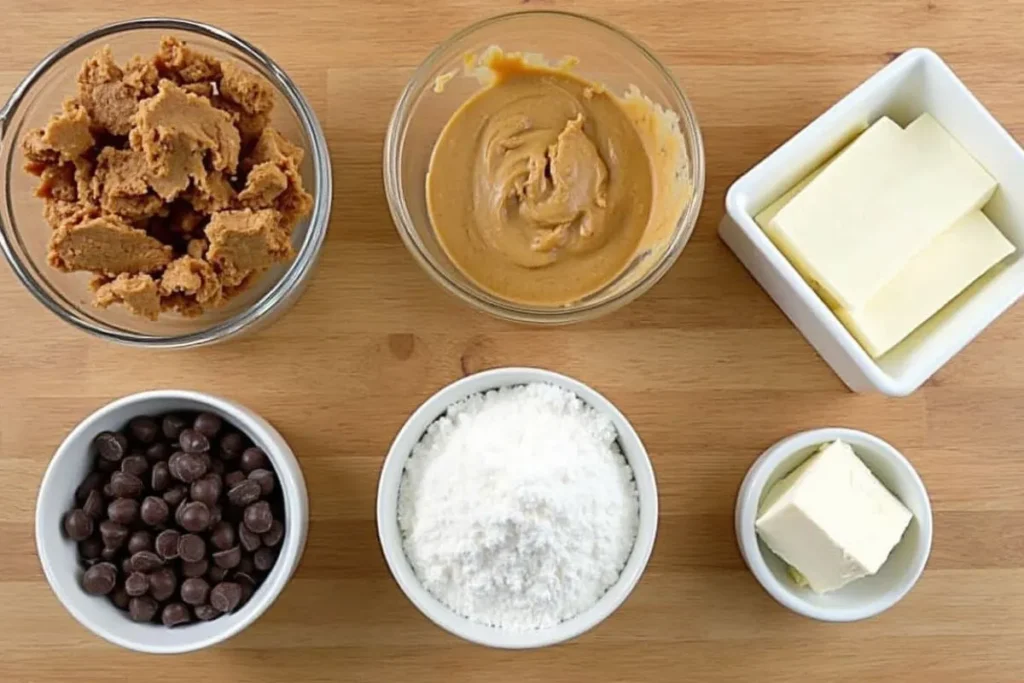
| Butterfinger candy bars | 2 cups, crushed | About 16 fun-sized bars. Crush finely for even texture. |
| Cream cheese (softened) | 8 ounces | Adds creaminess and helps bind the mixture. Let it soften for easier mixing. |
| Peanut butter | 1 cup | Smooth peanut butter works best for a uniform texture. Avoid chunky varieties. |
| Powdered sugar | 2 cups | Sweetens the mixture and thickens it for rolling into balls. |
| Chocolate chips | 2 cups | Melted for dipping. Choose your favorite: milk, dark, or white chocolate. |
| Optional: Sprinkles | As needed | Add a decorative touch to the finished treats. |
Feel free to customize the ingredients! You can substitute Butterfinger candy bars with other favorites like Reese’s or Snickers. Gluten-free or sugar-free variations are also easy to achieve by swapping standard ingredients for their alternative versions.
Equipment You’ll Need
To make these Butterfinger Balls, you don’t need any fancy kitchen tools, but there are a few essentials that will make the process easier and more efficient.
Here’s a list of the equipment you’ll need to begin:
- Mixing Bowls – A large mixing bowl is essential for combining the Butterfinger pieces with the peanut butter and other ingredients. A medium-sized bowl works well for melting chocolate.
- Food Processor or Rolling Pin – You’ll need something to crush the Butterfinger candy bars. A food processor is quick and efficient, but if you don’t have one, you can place the bars in a zip-top bag and crush them with a rolling pin.
- Cookie Scoop or Hands – A cookie scoop helps portion out the dough evenly, making it easier to form uniform balls. Alternatively, you can use your hands, but a scoop ensures consistency and saves time.
- Parchment Paper – Lining your baking sheet with parchment paper prevents the balls from sticking and makes cleanup a breeze.
- Microwave Safe Bowl or Double Boiler – You’ll need a microwave-safe bowl if you’re using the microwave to melt the chocolate. Alternatively, a double boiler is great for melting chocolate on the stove without the risk of burning it.
- Forks or Toothpicks – These tools are perfect for dipping the balls into the melted chocolate without making a mess.
By using the right equipment, you can streamline the process and make your Butterfinger Balls with ease!
How to Make Butterfinger Balls
Making Butterfinger Balls is simple and fun! With just a few ingredients, you can create a delicious treat that everyone will love.
Here’s how to make these chocolate-coated balls step by step:

1: Prepare the Butterfinger Mixture
- Crush the Butterfinger Bars:
- Use a food processor to crush the candy bars into small crumbs, or place them in a plastic bag and crush them using a rolling pin.
- You want the crumbs to be small but not powdery.
- Mix with Peanut Butter and Cream Cheese:
- Add the crushed Butterfinger to a large mixing bowl.
- Mix in softened cream cheese and peanut butter using a hand mixer or stand mixer.
- Beat until smooth and fully combined.
- Add Powdered Sugar:
- Gradually mix in powdered sugar to help the mixture bind and become thick.
- Start with 1 cup and add more as needed to reach a dough-like consistency.
2: Shape the Balls
- Scoop the Mixture:
- Use a cookie scoop or your hands to scoop out about 1 inch of the mixture at a time.
- Roll the mixture into smooth, round balls.
- Chill the Balls:
- Put the balls on a baking sheet lined with parchment paper.
- Place them in the refrigerator for 30 minutes so they can harden.
- If you need to speed things up, place them in the freezer for 15-20 minutes.
3: Melt the Chocolate
- Choose Your Chocolate:
- You can choose from milk chocolate, dark chocolate, or white chocolate—whichever one you like best.
- Melt the Chocolate:
- Microwave Method: Put the chocolate chips in a microwave-safe bowl and heat them in 30-second bursts, stirring in between each one.
- Simmering Method: Place water in a saucepan and heat it until it reaches a gentle simmer. Place a heat-safe bowl on top and stir the chocolate until it’s smooth and melted.
- Optional for Smooth Coating:
- Add 1 tablespoon of vegetable shortening to the chocolate to make it smoother and shinier for dipping.
4: Coat the Balls in Chocolate
- Dip Each Ball:
- Use a fork or toothpick to dip each chilled ball into the melted chocolate, ensuring it’s fully coated.
- Remove Excess Chocolate:
- Gently tap the fork or toothpick on the side of the bowl to shake off any excess chocolate.
- Put the coated balls back onto the parchment paper.
- Decorate (Optional):
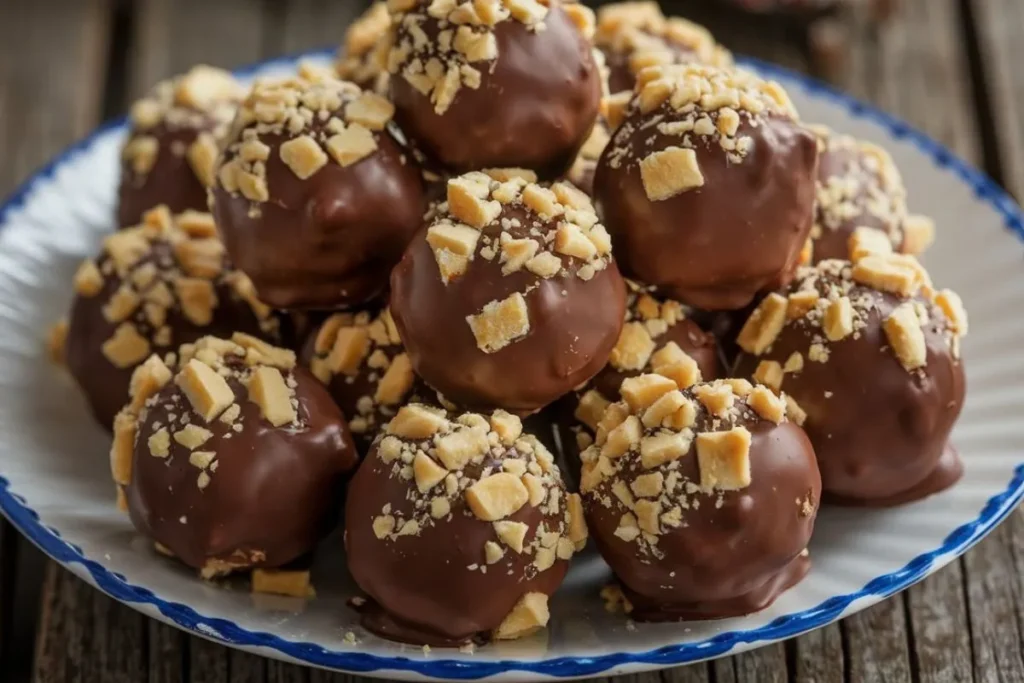
- You can sprinkle extra crushed Butterfinger or sprinkles on top of the chocolate for decoration.
- For a drizzly effect, drizzle more chocolate over the top for added flair.
5: Let the Chocolate Set
- Refrigerate:
- Place the baking sheet with the coated balls in the refrigerator for 30-60 minutes, or until the chocolate is fully set.
- Store:
- Once the chocolate is hardened, you can store the Butterfinger Balls in an airtight container.
- They will stay fresh in the refrigerator for up to one week or can be frozen for longer storage.
Additional Tips for Perfect Butterfinger Balls
Here are some simple ways to make your Butterfinger Balls even more delicious or to fit your dietary preferences:
- Flavor Options: If you’re looking to change up the flavor, try swapping the Butterfinger bars for other candy bars, such as Snickers or Reese’s. These will give the balls a different taste and texture while keeping them just as sweet and satisfying. Additionally, you can add chopped nuts like peanuts, almonds, or pecans for extra crunch. Mini chocolate chips also work well in the mixture for an added pop of chocolate throughout.
- Dairy-Free Option: For those following a dairy-free diet, making Butterfinger Balls is still possible! Just swap the cream cheese for a dairy-free option, such as coconut cream or dairy-free cream cheese. For the chocolate coating, choose dairy-free chocolate chips or vegan chocolate to ensure the dessert remains completely dairy-free.
- Lower Sugar: If you’re trying to reduce sugar, you can easily make a lower-sugar version. Simply opt for sugar-free chocolate and use a sweetener like Stevia instead of powdered sugar. This will give you a guilt-free version without sacrificing flavor.
With these helpful tips, you can customize your Butterfinger Balls to suit your tastes or dietary needs. Enjoy creating your perfect treat!
Serving Butterfinger Balls

- Butterfinger Balls are perfect for any occasion. Serve them at:
- Parties
- Holidays
- Family gatherings
- Casual get-togethers
- For a decorative touch, arrange them on a platter and consider:
- Adding extra sprinkles or crushed Butterfinger bits on top for color and texture.
- Using festive cups or bowls to serve them.
- These treats can be served:
- At room temperature for a soft texture.
- Chilled from the fridge for a firmer bite.
- Pair them with:
- Coffee, tea, or milk for a delightful dessert experience.
- A cold beverage for a refreshing contrast.
Conclusion
Butterfinger Balls are an easy, no-bake dessert that’s perfect for any occasion. Whether you’re looking for a quick snack, preparing for a holiday gathering, or just want a sweet treat for yourself, these chocolate-coated balls offer a delicious mix of creamy, crunchy, and chocolatey flavors.
Plus, they are quick to make, requiring just a few simple ingredients like Butterfinger candy bars, peanut butter, and chocolate.
These treats are customizable, so you can experiment with different coatings or fillings to match your tastes. Once you try making Butterfinger Balls, you’ll want to keep them in your dessert rotation. Not only do they taste great, but they are also fun to make—especially with kids!
Enjoy making these sweet bites, and let me know how your Butterfinger Balls turned out in the comments below. I’d love to hear about your unique twists and ideas!
FAQs
1. How long can I store Butterfinger Balls?
You can keep Butterfinger Balls in an airtight container in the fridge for up to one week. If you want to keep them for longer, they freeze well for up to 6 months. To prevent the balls from sticking together, layer them with parchment paper. If you’re storing them in the freezer, let them thaw for 10-15 minutes before serving for the best texture.
2. Can I make Butterfinger Balls dairy-free?
Yes, you can easily make this recipe dairy-free! Swap the cream cheese for a non-dairy alternative, such as vegan cream cheese or cashew-based cream cheese. Use dairy-free chocolate chips for the coating, and make sure your Butterfinger candy bars are dairy-free as well. Several brands offer dairy-free chocolate and candy options, so you can still enjoy this delicious treat without any dairy.
3. How do I prevent the chocolate from seizing?
When you melt chocolate, just a tiny bit of moisture can make it clump up and become grainy. To prevent this, make sure your utensils and bowls are completely dry. Avoid splashing any water into your chocolate, and if you’re using a double boiler, make sure the bowl doesn’t touch the water. If you’re microwaving, stir every 30 seconds to ensure even melting. You can also add a small amount of shortening or vegetable oil to the chocolate to keep it smooth.
4. Can I use other candy bars instead of Butterfingers?
Yes, you can substitute Butterfinger candy bars with other candy bars, like Snickers, Reese’s, or Twix, to change the flavor profile. Keep in mind that the texture might change slightly depending on the candy, but it’ll still result in a tasty treat. If you want to stick with a peanut butter-based flavor, Reese’s is a great option.
5. Why are my Butterfinger Balls too soft?
If your Butterfinger Balls are too soft, it’s likely because the mixture wasn’t chilled long enough before rolling or dipping. Make sure to refrigerate the mixture for at least 30 minutes before shaping, and chill the balls again after dipping them in chocolate. If you find the mixture too sticky to work with, you can add a bit more powdered sugar to firm.

