If you want a pumpkin pie recipe that works every time, this is it.
I’ve been making pumpkin pies for more Thanksgivings and fall get-togethers than I can count, and this particular recipe has become my absolute favorite.
It’s the one I turn to year after year because it consistently gives me a beautifully smooth, creamy pie with that perfect balance of warm spices.
What I love most is how straightforward it is. You don’t need to be a pastry chef to get this right.
I’m going to walk you through everything, step by step, and share some of the little tricks I’ve learned along the way.
So, let’s get ready to bake a pumpkin pie that’ll have everyone asking for a second slice.
Why I Swear By This Pumpkin Pie Recipe
Over the years, I’ve tried many pumpkin pie recipes. Some were too complicated, others a bit bland, or the texture just wasn’t quite right. This one, though, hits all the marks for me.
- It’s Genuinely Easy: The steps are simple, and using sweetened condensed milk is a fantastic shortcut. I find it creates a wonderfully rich and smooth filling without any fuss.
- Classic Comforting Flavor: The spices are just right, not too overwhelming but definitely present. It’s that taste of autumn everyone loves.
- Perfectly Creamy Texture: The goal is a silky custard that sets up beautifully, and this recipe delivers. No one wants a rubbery or weepy pumpkin pie, and I’ll show you how to avoid that.
- Dependable Results: Because it’s so straightforward, I know I can count on it, even when I’m busy with other holiday cooking.
Ingredients for the Perfect Pumpkin Pie
The ingredient list is pretty simple, which is always a bonus in my book. Here’s what we’ll be using:
For the filling:
- 1 (15-ounce) can pure pumpkin puree (not pie filling)
- 1 (14-ounce) can sweetened condensed milk
- 2 large eggs
- 1 teaspoon ground cinnamon
- 1/2 teaspoon ground ginger
- 1/2 teaspoon ground nutmeg
- 1/2 teaspoon salt
For the crust:
- 1 (9-inch) unbaked pie crust (store-bought works perfectly)
I always keep Eagle Brand condensed milk on hand because it’s consistent, but any brand works fine.
For the pumpkin, make sure you’re buying pure puree, not the pre-spiced pie filling.
I learned this the hard way when I accidentally grabbed the wrong can and ended up with an overly sweet, oddly seasoned pie.
My Go-To Baking Tools
You don’t need anything too fancy:
- A standard 9-inch pie dish. Glass or ceramic dishes are great because they bake evenly. If you think you might freeze the pie, an aluminum pie pan is a good option.
- A large mixing bowl for the filling.
- A whisk to get everything smooth.
- Your trusty measuring cups and spoons.
How to Make Pumpkin Pie
Ready? Let’s put this delicious pie together.
1. Preparing Your Oven and Crust
- Preheat oven to 425°F
- Let refrigerated crusts sit at room temperature for 10 minutes (frozen crusts can go straight in)
- Prick the bottom of your crust all over with a fork
- Line with parchment paper and fill with pie weights or dried beans
- Bake for 10 minutes
- Remove weights and parchment, bake 5 more minutes until lightly golden
This prevents soggy bottoms. Skip if you’re short on time, but results won’t be as good.
2. Making the Filling
- Whisk pumpkin puree and sweetened condensed milk until smooth
- Add eggs one at a time, whisking well after each
- Add cinnamon, ginger, nutmeg, and salt
- Whisk until completely combined and uniform in color
- Keep whisking if you see lumps
Don’t over-mix. Gentle but thorough whisking prevents air bubbles that can cause cracks.
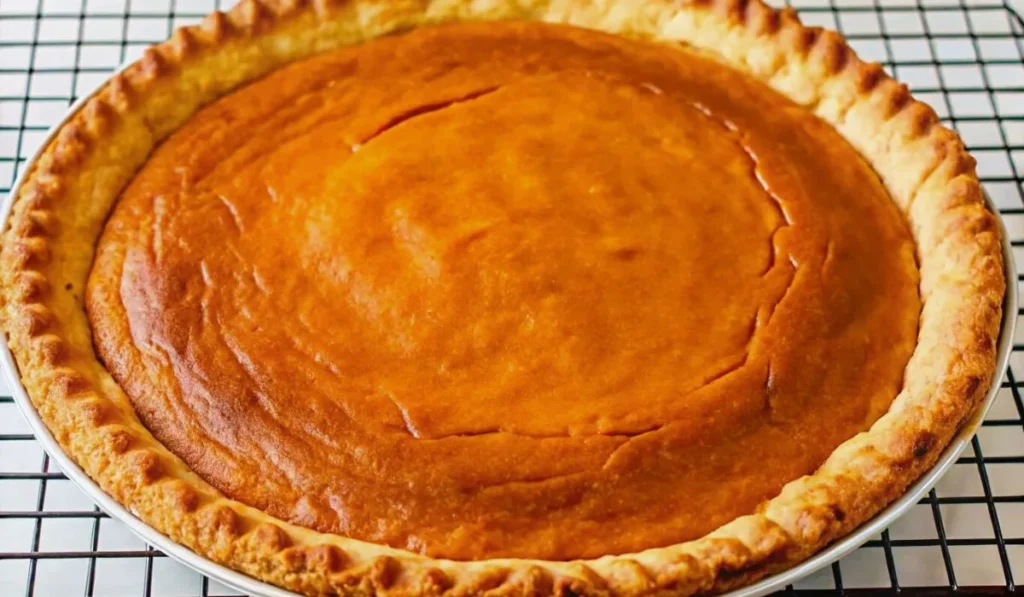
3. Baking the Pie
- Pour filling into prepared crust (should almost reach the top)
- Bake at 425°F for 15 minutes
- Reduce temperature to 350°F
- Continue baking 35-40 minutes
- Test doneness: knife inserted 1 inch from edge should come out clean
- Center should have slight jiggle (like set Jell-O)
- Cover crust edges with foil if browning too quickly (check at 30 minutes)
Cooling and Storage
This is where patience really pays off. Let the pie cool completely on a wire rack before cutting. This takes about 2 to 3 hours, but it’s essential for clean slices.
Once cooled, cover the pie and refrigerate it. Pumpkin pie must be stored in the refrigerator because of the eggs and dairy. It will keep for 3 to 4 days.
Common Problems and Solutions
- Cracked top: Usually caused by overbaking or cooling too quickly. The slight jiggle test prevents this.
- Soggy bottom: Blind baking helps, but you can also place your pie dish on a preheated baking sheet in the oven.
- Runny filling: Make sure you’re using pure pumpkin puree, not fresh pumpkin that might be too watery. Also, don’t underbake the pie.
- Too sweet or bland: The spice amounts are a starting point. I sometimes add an extra 1/2 teaspoon of cinnamon if my family wants more spice, or a pinch of ground cloves for depth.
Variations I’ve Tried
Over the years, I’ve experimented with different approaches:
- Fresh pumpkin: I’ve used fresh sugar pumpkins, but honestly, the canned puree is more consistent. If you want to try fresh, you’ll need about 2 cups of puree from a 2-pound pumpkin. Roast it, scoop out the flesh, and puree until smooth.
- Graham cracker crust: This works beautifully and adds a nice texture contrast. The sweet, slightly crunchy crust pairs perfectly with the smooth filling.
- Mini pies: I make these in muffin tins for parties. Line each cup with a circle of pie dough, fill, and bake for about 20 minutes. Kids especially love having their own individual pie.
- Extra spices: A pinch of cardamom adds an interesting note, and some people like a splash of vanilla extract in the filling. Start small and taste as you go.
Make-Ahead Tips
You can bake this pie up to two days ahead, which is perfect for holiday planning. Just cover it well and refrigerate.
For longer storage, pumpkin pie freezes beautifully. Wrap the cooled pie in several layers of plastic wrap, then aluminum foil. It keeps for up to a month in the freezer. Thaw overnight in the refrigerator before serving.
Serving Suggestions
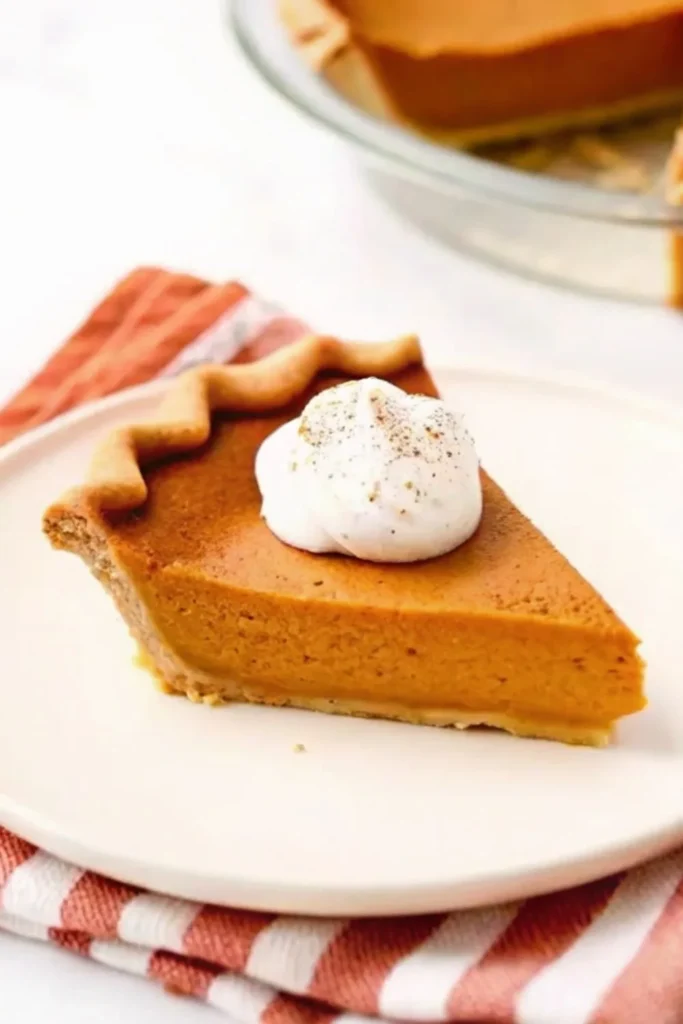
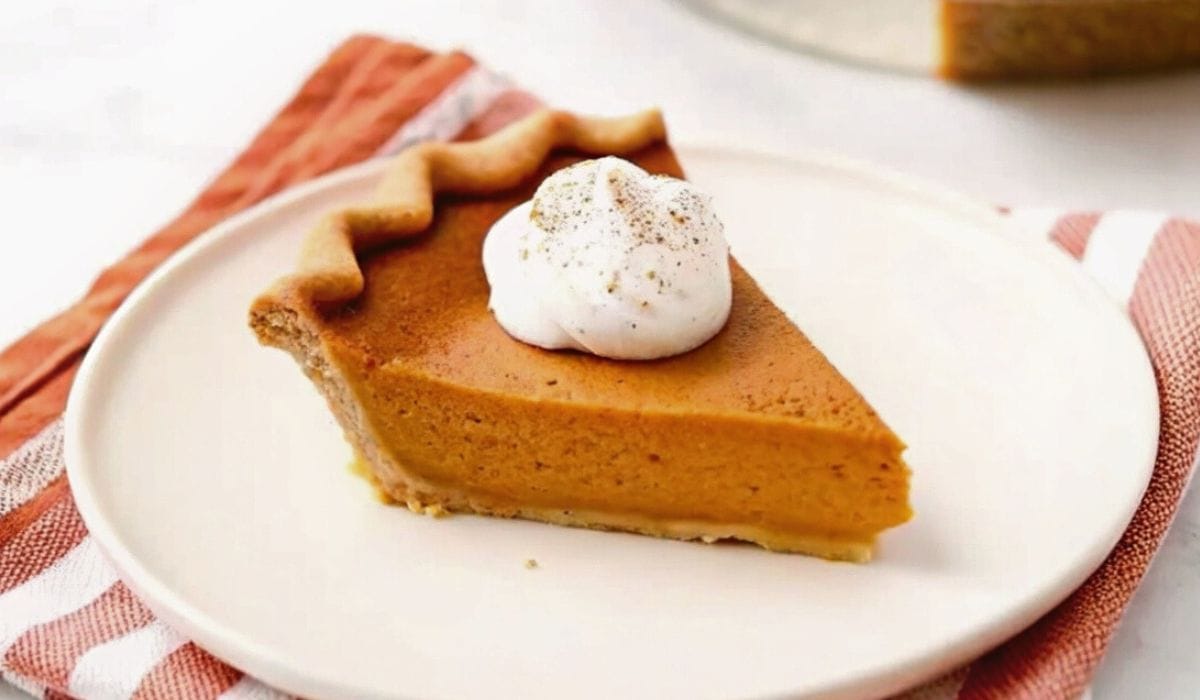
Fresh whipped cream is my go-to topping. I make it with heavy cream, a touch of sugar, and vanilla extract. It’s so much better than store-bought.
A light dusting of cinnamon over the whipped cream looks elegant and adds extra aroma. Some people like vanilla ice cream instead, especially if the pie is served chilled.
Conclusion
This recipe has never failed me, even when I was a nervous new baker. The sweetened condensed milk makes it nearly foolproof, and the flavor is exactly what people expect from a classic pumpkin pie.
The key is not overthinking it. Good ingredients, proper technique, and patience during cooling will give you a pie that looks and tastes like it came from a bakery.
I hope this becomes your go-to pumpkin pie recipe too. There’s something deeply satisfying about pulling a perfect pie from your own oven, especially when you know it’s going to make people happy around your table.
Pumpkin Pie Recipe
Ingredients
Equipment
Method
- Preheat oven to 425°F (220°C). Prepare pie crust in a 9-inch pie dish. For a crispier crust, blind bake it first for 15-17 minutes using pie weights and parchment paper.
- In a large bowl, whisk together pumpkin puree, sweetened condensed milk, eggs, cinnamon, ginger, nutmeg, and salt until smooth.
- Pour the filling into the prepared pie crust.
- Bake at 425°F (220°C) for 15 minutes.
- Reduce the oven temperature to 350°F (175°C) and continue baking for 35-40 minutes, or until a knife inserted 1 inch from the crust comes out clean. The center should be slightly jiggly. Use foil or a pie crust shield if the edges brown too quickly.
- Remove pie and cool on a wire rack for at least 2-3 hours before slicing to allow the filling to fully set.
- Serve with whipped cream if desired. Once cooled, cover and refrigerate leftovers for up to 3-4 days.