This simple collard greens recipe delivers perfectly cooked greens in just 15 minutes with minimal ingredients. You’ll love how this healthy side dish transforms tough leaves into tender, flavorful greens.
Why This Recipe Works
I discovered this cooking method years ago from a Brazilian friend. Unlike traditional Southern collard greens that simmer for hours, this technique uses high heat and olive oil to create crispy edges and tender centers quickly.
The secret lies in the preparation. You slice the collards into thin strips, then cook them fast in hot oil. This creates those amazing crispy bits while keeping the greens bright and nutritious.
What You’ll Need
Ingredients:
- 1 large bunch collard greens (about 10 ounces)
- 1½ tablespoons extra-virgin olive oil
- ¼ teaspoon fine sea salt
- 2 medium garlic cloves, minced
- Pinch of red pepper flakes (optional)
- Fresh lemon wedges for serving
Equipment:
- Sharp chef’s knife
- Large, heavy-bottomed skillet (cast iron works great)
- Cutting board
Step-by-Step Instructions
- Remove the ribs. Cut out the thick center rib from each collard leaf. These ribs are tough and take longer to cook.
- Stack and roll. Stack the rib-free leaves on top of each other. Roll them tightly into a cigar shape for easier slicing.
- Slice thin. Cut across the rolled leaves as thinly as possible. Aim for strips about ⅛ inch wide. Sharp knife work makes a huge difference.
- Chop smaller. Give the sliced greens a few extra chops to break up long strands. You want bite-sized pieces.
- Heat the pan. Heat your skillet over medium-high heat. Add the olive oil and let it shimmer.
- Add greens. Add all the collard greens and salt at once. Stir immediately to coat everything in oil.
- Cook in intervals. Let the greens cook for 30 seconds, then stir. Repeat this process for 3 to 6 minutes total.
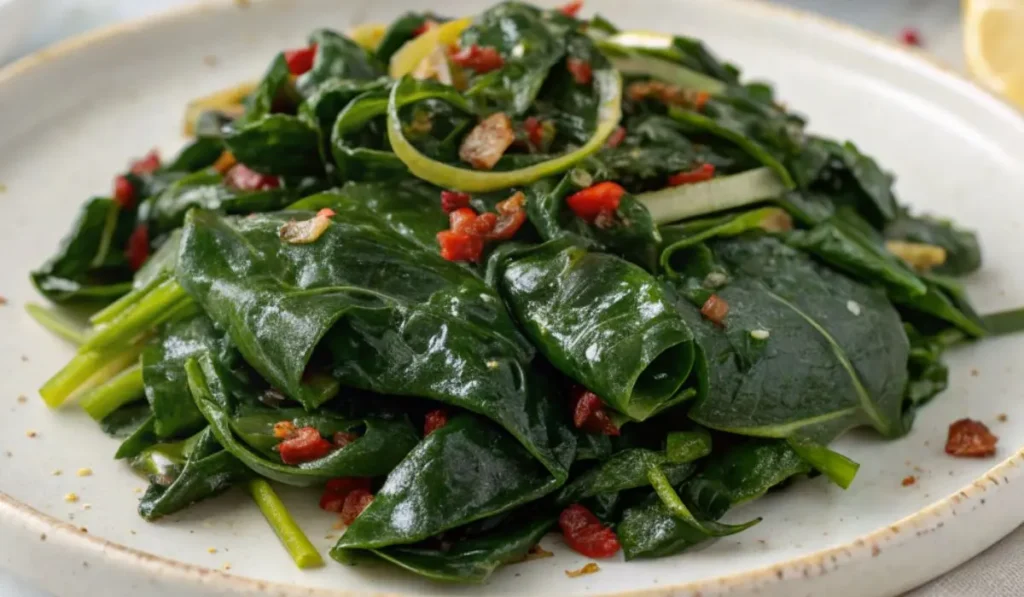
- Watch for browning. Look for the greens to wilt and turn dark green. Some edges should start browning. Those crispy bits taste incredible.
- Add aromatics. Once you see browning, add the garlic and red pepper flakes. Stir for about 30 seconds until fragrant.
- Finish and serve. Remove from heat immediately. The residual heat will finish cooking the garlic without burning it. Serve right away with fresh lemon wedges.
Pro Tips for Perfect Results
- Don’t skip the oil. It helps your body absorb the nutrients and creates those crispy edges.
- Work in batches. If doubling the recipe, cook each batch separately. Overcrowding makes greens steam instead of crisp.
- Keep it moving. The 30-second intervals prevent burning while ensuring even cooking.
- Add garlic last. This prevents it from burning during the longer cooking time.
Flavor Variations
This base recipe works with many flavor profiles:
- Mediterranean Style. Add a splash of balsamic vinegar and some pine nuts.
- Asian Twist. Replace garlic with ginger. Finish with soy sauce and sesame oil instead of lemon.
- West African Inspired. Top with chopped peanuts for authentic flavor.
- Spicy Version. Double the red pepper flakes or add a pinch of cayenne.
What to Serve With Collard Greens
These versatile greens pair with almost anything:
- Black beans and rice for a complete meal
- Grilled chicken or fish
- Pasta dishes and lasagna
- Cornbread and other Southern favorites
- Roasted vegetables
Storage and Reheating
Store leftovers in the refrigerator for up to 3 days. Reheat gently in a skillet over low heat.
The texture changes slightly after storage, but the flavor remains great. Add a splash of water if they seem dry.
Nutritional Benefits
Collard greens pack serious nutrition. They’re loaded with vitamins A, C, and K. They also provide calcium, iron, and fiber.
The quick cooking method preserves more nutrients than long braising. The olive oil helps your body absorb fat-soluble vitamins.
Common Mistakes to Avoid
- Leaving ribs in. They’re too tough and take much longer to cook.
- Cutting too thick. Thin slices cook faster and taste better.
- Cooking too long. Overcooked greens become mushy and lose their bright color.
- Adding garlic too early. It burns before the greens finish cooking.
Why This Method Beats Traditional Recipes
Traditional collard greens recipes often require hours of simmering with pork or bacon. While delicious, they’re time-consuming and heavy.
This Brazilian-inspired method delivers tender greens in minutes. The high heat creates complex flavors without added meat or long cooking times.
You get all the satisfaction of perfectly cooked greens without the wait.
Final Thoughts
This collard greens recipe proves that healthy eating doesn’t mean boring food. The combination of crispy edges, tender centers, and bright lemon flavor creates something special.
Try this method once, and you’ll never go back to mushy, overcooked greens. It’s become my go-to side dish for busy weeknights and special dinners alike.
The best part? You probably have all the ingredients in your kitchen right now. Give it a try tonight and taste the difference proper technique makes.

Brazilian-Style Collard Greens
Ingredients
Equipment
Method
- Remove the ribs: Cut out the thick center rib from each collard leaf. These ribs are tough and take longer to cook.
- Stack and roll: Stack the rib-free leaves on top of each other. Roll them tightly into a cigar shape for easier slicing.
- Slice thin: Cut across the rolled leaves as thinly as possible. Aim for strips about ⅛ inch wide. Sharp knife work makes a huge difference.
- Chop smaller: Give the sliced greens a few extra chops to break up long strands. You want bite-sized pieces.
- Heat the pan: Heat your skillet over medium-high heat. Add the olive oil and let it shimmer.
- Add greens: Add all the collard greens and salt at once. Stir immediately to coat everything in oil.
- Cook in intervals: Let the greens cook for 30 seconds, then stir. Repeat this process for 3 to 6 minutes total.
- Watch for browning: Look for the greens to wilt and turn dark green. Some edges should start browning. Those crispy bits taste incredible.
- Add aromatics: Once you see browning, add the garlic and red pepper flakes. Stir for about 30 seconds until fragrant.
- Finish and serve: Remove from heat immediately. The residual heat will finish cooking the garlic without burning it. Serve right away with fresh lemon wedges.