This simple french bread recipe creates bakery-quality loaves at home with just basic ingredients and straightforward techniques. Making homemade french bread has never been more accessible for both beginners and experienced bakers alike.
Fresh baked bread brings comfort and satisfaction to any kitchen. This foolproof recipe produces two golden, crusty loaves with a light, airy interior that rivals professional bakeries.

Essential French Bread Ingredients
Simple pantry staples create amazing homemade bread when combined properly:
- 2 1/4 cups warm water (110-115°F)
- 2 tablespoons granulated sugar
- 1 tablespoon instant or active dry yeast
- 2 1/4 teaspoons salt
- 2 tablespoons oil (olive, canola, vegetable, or avocado)
- 5 1/2 to 6 cups all-purpose or bread flour
The key to successful bread making lies in using the right water temperature. Too hot kills yeast, while too cold prevents proper activation.
Step-by-Step French Bread Instructions
Creating perfect artisan bread follows a systematic process that delivers consistent results:
Mixing the Dough:
- Combine warm water, sugar, and yeast in a stand mixer bowl
- Let active dry yeast foam for 3-5 minutes (skip for instant yeast)
- Add salt, oil, and 3 cups flour
- Gradually mix in remaining flour until dough clears bowl sides
Kneading Process:
- Knead for 2-3 minutes until smooth
- Add flour 1/4 cup at a time if dough sticks
- Achieve soft, slightly tacky texture without excessive residue
The dough consistency matters more than exact flour measurements. Humidity and temperature affect flour needs.
Two Rising Methods for Best Results
Choose your preferred rising technique based on available time:
Quick Method:
- Leave dough in mixer bowl
- Cover and rest 10 minutes
- Stir down with mixer for 10 seconds
- Repeat cycle 5 more times
Traditional Method:
- Transfer to greased bowl
- Cover with towel or plastic wrap
- Let rise until doubled (about 1 hour)
Both methods produce excellent crusty french bread with tender crumb.
Shaping Your French Loaves
Proper shaping creates the classic french bread appearance and texture:
- Divide dough in half on lightly greased surface
- Pat each portion into thick rectangle
- Roll up from long edge, pressing out air bubbles
- Pinch seams to seal completely
- Place seam-side down on parchment-lined baking sheets
Shape loaves to your preferred size. Twelve-inch loaves work well, but slight variations won’t affect quality.
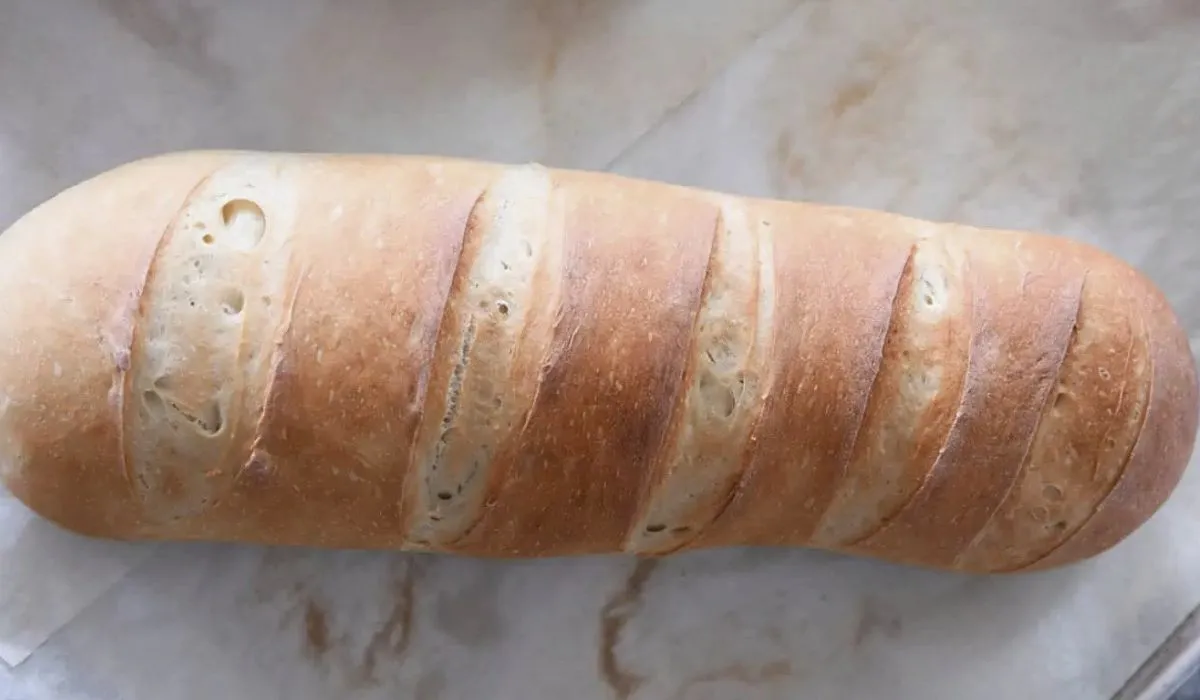
Scoring and Final Rise
Scoring prevents random cracking and creates attractive patterns:
- Use bread lame, sharp razor, or very sharp knife
- Cut diagonal gashes on top of each loaf
- Score before final rise to prevent deflation
- Cover loaves with greased plastic wrap
- Let rise until puffy and nearly doubled
A sharp scoring tool prevents dough deflation during this crucial step.
Baking Tips for Golden Crust
Achieving bakery-quality crust requires proper oven techniques:
- Preheat oven to 375°F with rack in center position
- For extra golden color, use 400-425°F
- Toss 3-4 ice cubes on oven bottom before adding bread
- Close door quickly to trap steam
- Bake 25-30 minutes until golden brown
The ice cube trick creates steam that develops a crispy, golden exterior while keeping the interior soft.
Whole Wheat Variations
Transform this easy bread recipe with whole wheat flour for added nutrition:
- Start with half whole wheat flour substitution
- Use white whole wheat for lighter texture
- Add 2-3 minutes extra kneading time
- Consider adding vital wheat gluten for better rise
Whole wheat versions offer nutty flavor and increased fiber content.
Troubleshooting Common Issues
Solve frequent bread problems with these expert tips:
Flat Loaves:
- Use proper flour amounts based on dough feel
- Ensure adequate kneading time
- Don’t skip scoring step
Dense Texture:
- Avoid too much flour
- Check yeast freshness
- Maintain proper rising temperature
Pale Crust:
- Move oven rack higher
- Increase temperature by 25 degrees
- Try the ice cube steam method
Storage and Freezing
Maximize your homemade bread’s freshness and shelf life:
- Cool completely before storing
- Wrap in plastic wrap or bread bags
- Freeze for up to 3 months after baking
- Thaw at room temperature before serving
Fresh bread tastes best within 2-3 days but freezes beautifully for later enjoyment.
Why This Recipe Works
This reliable french bread recipe succeeds because it focuses on technique over complicated ingredients. The flexible flour measurements accommodate different conditions, while the dual rising methods fit various schedules.
Thousands of home bakers have achieved success with this straightforward approach. The simple ingredient list keeps costs low while delivering professional results.
Start your bread making journey today with this proven recipe that transforms basic pantry items into golden, crusty loaves your family will love.
Easy Homemade French Bread
Ingredients
Equipment
Method
- In the bowl of an electric stand mixer fitted with the dough hook, combine the warm water, sugar and yeast. If using active dry yeast, let the mixture bubble and foam before proceeding (this can take 3-5 minutes). If using instant yeast, proceed with the recipe immediately.
- Add the salt, oil and 3 cups of flour and mix. Gradually add in 2 1/2 to 3 more cups of flour. The dough should clear the sides of the bowl and form a soft ball that doesn’t leave a lot of residue on your fingers.
- Knead for 2-3 minutes until the dough is smooth. If the dough starts to cling to the sides of the bowl, add 1/4 cup of flour at a time until a sturdy but soft ball of dough forms.
- Rising Method 1: Leave the dough in the mixer, cover with a lid or towel, and let the dough rest for 10 minutes. Stir it down by turning on the mixer for 10 seconds. Repeat the “rest and stir down” cycle five more times.
- Rising Method 2: Transfer the dough to a lightly greased bowl and cover with a towel or greased plastic wrap. Let the dough rise until doubled, about an hour, depending on the warmth of your kitchen.
- Turn the dough onto a lightly greased surface and divide in half. Pat each section into a thick rectangle, about 9×13 inches. Roll the dough up starting from the long edge, pressing out any air bubbles with the heel of your hand, and pinch the edge to seal. Arrange seam side down on large baking sheets lined with parchment paper.
- With a bread lame, razor blade or very sharp knife, cut several diagonal gashes on the top of each loaf. Cover the loaves with greased plastic wrap or a kitchen towel, and let rise until noticeably puffy and nearly doubled in size, about an hour.
- Preheat the oven to 375°F and make sure an oven rack is in the center position. For extra browning, preheat to 400-425°F and/or move the oven rack up one position.
- Optional: For an extra golden, crisp crust, place the loaves in the preheated oven and immediately toss 3-4 ice cubes on the bottom of the oven. Close the oven door quickly but gently.
- Bake the loaves for 25-30 minutes until golden brown and baked through. If desired, brush melted butter over the hot loaves to soften the crust slightly.