This lemon curd recipe creates the perfect balance of sweet and tart flavors with just four simple ingredients. After making dozens of batches for family gatherings and bake sales, I’ve learned that homemade lemon curd beats store-bought versions every single time.
The silky smooth texture and bright citrus flavor make this versatile spread perfect for everything from morning toast to elegant dessert fillings. Best of all, you can have fresh lemon curd ready in just 25 minutes.
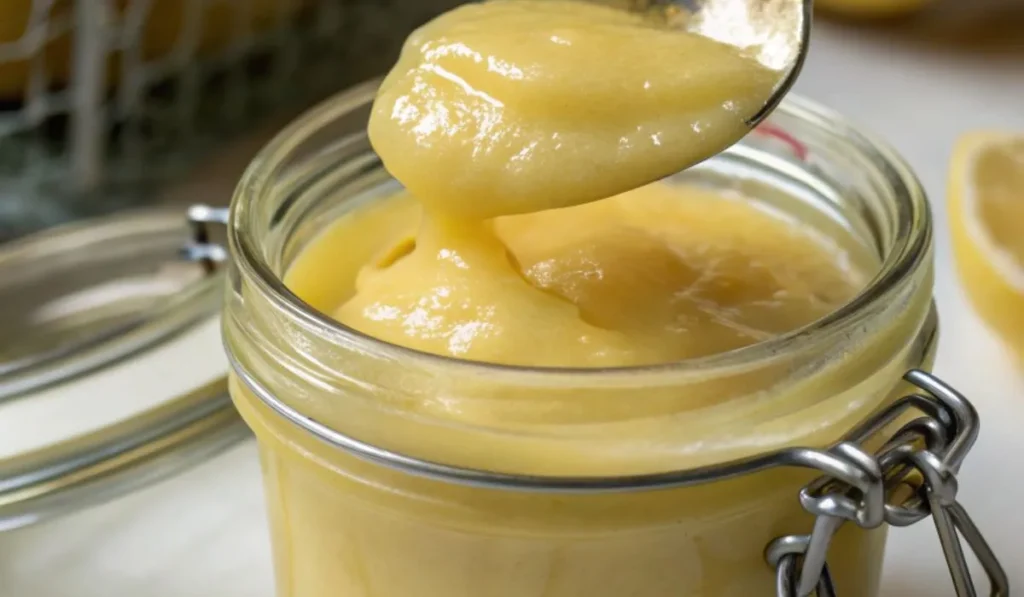
What Makes Great Lemon Curd
Fresh lemon juice is the foundation of exceptional homemade lemon curd. Here are the key factors I’ve learned from years of testing:
- Use only fresh lemon juice. Bottled juice creates overly acidic, artificial flavors
- Test doneness with a wooden spoon. The curd should coat the back completely
- Maintain low, steady heat. High temperatures create lumpy, scrambled textures
- Add cold butter at the end. This creates the signature silky smooth finish
Essential Ingredients for Lemon Curd
Quality ingredients make all the difference in homemade lemon curd. Here’s what you need:
- Fresh lemons. You’ll need 2 large lemons for both zest and juice
- Egg yolks. 6 yolks create the perfect creamy texture (save whites for meringue!)
- Granulated sugar. 1 cup of white sugar (avoid brown sugar as it changes the color)
- Unsalted butter. 1/2 cup of cold butter for silky smoothness
Each ingredient plays a crucial role. The egg yolks provide richness and help thicken the mixture. Cold butter, added at the end, creates that luxurious mouthfeel that makes this curd irresistible.
Step-by-Step Instructions
Making lemon curd from scratch is surprisingly simple when you follow these tested steps:
- Separate 6 egg yolks into a bowl and save whites for another use
- Zest 2 lemons to get about 2 tablespoons of fresh zest
- Juice the lemons until you have 1/2 cup (strain out all seeds)
- Cut butter into small cubes and keep cold until needed
- Strain egg yolks into a heavy-bottomed pot to remove any white pieces
- Whisk in sugar until the mixture lightens in color and looks creamy
- Gradually add lemon juice while whisking to prevent curdling
- Add lemon zest and mix everything together well
- Heat on low while whisking constantly – never stop stirring
- Watch for thickening – mixture should coat the back of a wooden spoon
- Remove from heat immediately when it just starts to bubble
- Stir in cold butter until completely melted and incorporated
- Strain through fine mesh sieve for silky smooth texture
- Cover surface with plastic wrap to prevent skin forming
- Refrigerate for at least 2 hours before using in recipes
Pro Tips from Years of Making Lemon Curd
These tested techniques have saved countless batches from common lemon curd mistakes:
- Keep heat on the lowest setting. Patience prevents scrambled eggs every time
- Never stop whisking while cooking. Constant motion ensures smooth, even texture
- Use a double boiler for better control. Perfect for stoves without true low heat
- Add butter while it’s cold. Cold butter cools the mixture and stops cooking instantly
- Strain the finished curd. Removes any lumps for restaurant-quality smoothness
Common Problems and Easy Fixes
- Thin consistency. If your cooled curd seems too runny, mix 1 tablespoon cornstarch with 3 tablespoons water. Heat while stirring until it thickens.
- Lumpy texture. Strain through a fine mesh sieve or blend with an immersion blender until smooth. This usually happens when the heat was too high.
- Bland flavor. Next time, pulse the lemon zest with sugar in a food processor. This releases the essential oils and intensifies the citrus taste.
Creative Ways to Use Lemon Curd
This versatile spread transforms ordinary desserts into something special:
- Spread on warm scones or English muffins for breakfast
- Use as cake filling between layers
- Swirl into cheesecake batter before baking
- Top vanilla ice cream for an instant dessert
- Fill tart shells for elegant individual desserts
- Mix into whipped cream for lemon mousse
Storage and Shelf Life
Proper storage techniques keep your lemon curd fresh and safe to eat:
- Refrigerator storage. Keeps fresh for up to one week when covered
- Use plastic wrap directly on surface. Prevents skin formation while cooling
- Freeze in small portions. Lasts up to three months in freezer-safe containers
- Thaw overnight in fridge. Maintains smooth texture after freezing
- Check for spoilage signs. Discard if you notice off smells or mold growth
Why Homemade Beats Store-Bought
After comparing dozens of commercial brands with homemade versions, the difference is clear. Store-bought lemon curd often contains artificial flavors and preservatives that mask the bright, natural citrus taste.
Making your own gives you complete control over sweetness levels and texture consistency. Plus, you know exactly what ingredients go into every batch.
This simple lemon curd recipe has become a staple in my kitchen repertoire. Whether you’re planning an elegant dinner party or just want to elevate your morning toast, this bright and creamy spread delivers consistent results every time.
Homemade Lemon Curd Recipe
Ingredients
Equipment
Method
- Separate 6 egg yolks into a bowl and save whites for another use
- Zest 2 lemons to get about 2 tablespoons of fresh zest
- Juice the lemons until you have 1/2 cup (strain out all seeds)
- Cut butter into small cubes and keep cold until needed
- Strain egg yolks into a heavy-bottomed pot to remove any white pieces
- Whisk in sugar until the mixture lightens in color and looks creamy
- Gradually add lemon juice while whisking to prevent curdling
- Add lemon zest and mix everything together well
- Heat on low while whisking constantly – never stop stirring
- Watch for thickening – mixture should coat the back of a wooden spoon
- Remove from heat immediately when it just starts to bubble
- Stir in cold butter until completely melted and incorporated
- Strain through fine mesh sieve for silky smooth texture
- Cover surface with plastic wrap to prevent skin forming
- Refrigerate for at least 2 hours before using in recipes