Making your own dill pickle recipe at home is surprisingly simple and incredibly rewarding.
After years of buying expensive store-bought pickles, I discovered this foolproof method that creates crispy, tangy pickles using just 8 basic ingredients.
The best part? Your refrigerator does most of the work while you wait for those amazing flavors to develop.
Essential Ingredients for Perfect Pickles
Here’s what you need to create restaurant-quality pickles in your own kitchen:
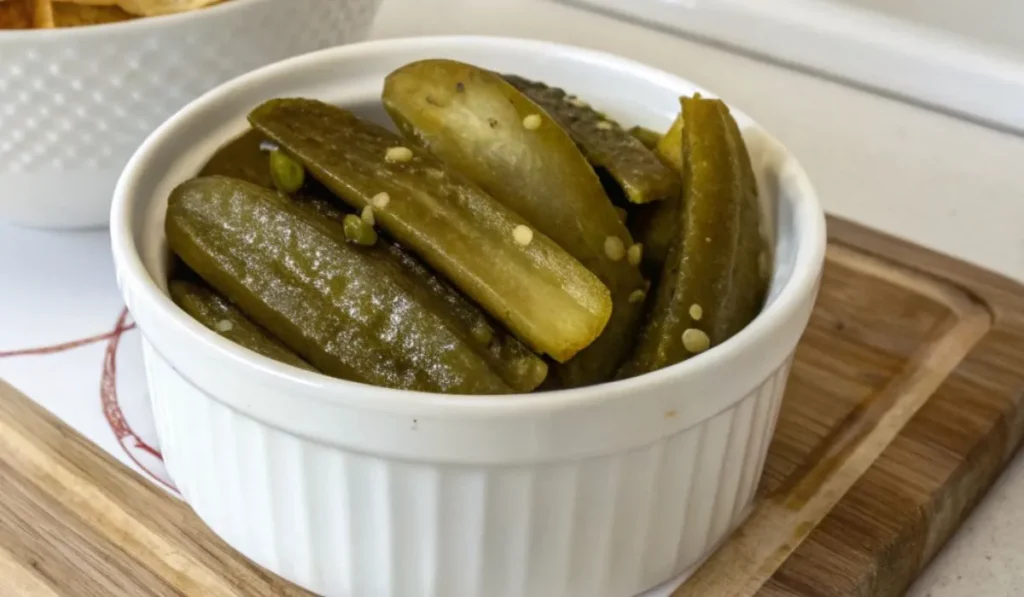
- 12-14 Persian cucumbers or 8-10 pickling cucumbers – Fresh, firm cucumbers are crucial for that perfect crunch
- 4 garlic cloves, halved – Adds that signature savory depth
- 2 teaspoons mustard seeds – Creates subtle spice and complexity
- 2 teaspoons peppercorns – Provides gentle heat and flavor
- Fresh dill sprigs – The star herb that gives pickles their classic taste
- 2 cups water – Forms the base of your pickling brine
- 2 cups distilled white vinegar – Creates the tangy, acidic environment
- 1/4 cup cane sugar – Balances the vinegar’s sharpness (won’t make them sweet!)
- 2 tablespoons sea salt – Essential for proper pickling and flavor
Step-by-Step Pickling Instructions
Follow these simple steps to transform fresh cucumbers into delicious homemade pickles:
- Prepare your cucumbers – Wash and slice them lengthwise into quarters for spears, or cut horizontally into thin rounds for chips
- Pack the jars – Divide cucumbers between 4 (8-ounce) or 2 (16-ounce) clean glass jars
- Add aromatics – Place halved garlic cloves, mustard seeds, peppercorns, and fresh dill sprigs into each jar
- Make the brine – Heat water, vinegar, sugar, and salt in a saucepan over medium heat, stirring until dissolved
- Pour and cool – Add hot brine to jars, covering cucumbers completely, then let cool to room temperature
- Refrigerate – Store jars in the fridge for proper pickle development
Timing and Storage Tips
Understanding pickle timing ensures the best results every time:
- Pickle chips – Ready to eat in just 24 hours, perfect for quick cravings
- Pickle spears – Need at least 48 hours for proper flavor development
- Peak flavor – Wait 5-6 days for the most incredible taste experience
- Storage life – Keep refrigerated for several weeks (they actually improve with time!)
- Temperature matters – Always store in the refrigerator for food safety and crispness
Choosing the Right Equipment
The right tools make pickle-making easier and more successful:
- Glass jars – Ball Mason jars or Weck jars work perfectly for safe storage
- Airtight seals – Proper sealing prevents contamination and maintains freshness
- Size options – 8-ounce jars for smaller batches, 16-ounce for larger families
- Clean equipment – Sterilize all jars and utensils before use
- Medium saucepan – For heating your pickling brine to dissolve ingredients
Creative Serving Ideas
These versatile pickles enhance countless dishes beyond snacking:
- Sandwich toppers – Add crunch to veggie burgers, grilled cheese, or deli sandwiches
- Salad additions – Dice pickles into potato salad, macaroni salad, or green salads
- Appetizer plates – Serve spears alongside cheese boards or charcuterie
- Burger companions – Perfect for backyard barbecues and summer cookouts
- Straight snacking – Enjoy them cold from the fridge for instant satisfaction
Common Mistakes to Avoid
Learn from my experience to get perfect results every time:
- Using old cucumbers – Fresh, firm cucumbers are non-negotiable for crispness
- Skipping the cooling step – Hot brine can make cucumbers mushy
- Opening jars too early – Patience creates better flavor development
- Overpacking jars – Leave space for brine to circulate around vegetables
- Using table salt – Sea salt or kosher salt work better than iodized varieties
Why Homemade Beats Store-Bought
After making hundreds of jars over the years, I can confidently say homemade wins every time:
- Superior taste – Fresh ingredients create cleaner, brighter flavors
- Perfect texture – Control the crispness level to your preference
- Cost savings – Making pickles costs significantly less than buying premium brands
- No preservatives – You know exactly what goes into your food
- Customizable – Adjust spice levels, sweetness, and garlic intensity
Troubleshooting Your Pickles
Sometimes things don’t go as planned, but most issues have simple solutions:
- Soft pickles – Use fresher cucumbers and ensure proper refrigeration
- Too salty – Rinse pickles before eating or dilute brine slightly
- Not tangy enough – Wait longer for flavor development or add more vinegar
- Cloudy brine – Normal fermentation process, pickles are still safe to eat
- Floating vegetables – Completely normal and doesn’t affect quality
This reliable dill pickle recipe has never failed me, and I’ve shared it with countless friends who now make their own pickles regularly.
The combination of crisp texture, balanced flavors, and simple preparation makes it perfect for beginners and experienced cooks alike.
Once you taste the difference homemade makes, you’ll wonder why you ever bought pickles from the store.

Easy Homemade Dill Pickles
Ingredients
Equipment
Method
- Prepare the cucumbers: Wash cucumbers thoroughly. For dill pickle spears, slice lengthwise into quarters. For pickle chips, slice horizontally into thin rounds (about 1/4 inch thick).
- Pack the jars: Divide sliced cucumbers evenly among your clean glass jars. Add halved garlic cloves, mustard seeds, peppercorns, and fresh dill sprigs to each jar, distributing evenly.
- Make the pickling brine: In a medium saucepan, combine water, white vinegar, sugar, and salt. Heat over medium heat, stirring constantly until sugar and salt completely dissolve (about 1 minute).
- Add brine to jars: Let the hot brine cool slightly, then carefully pour over the packed cucumbers, ensuring all vegetables are completely covered. Leave about 1/2 inch headspace at the top.
- Cool and refrigerate: Allow jars to cool completely to room temperature, then seal tightly and place in refrigerator immediately.
- Wait for pickling: Pickle chips will be lightly pickled in 24 hours, while spears need at least 48 hours. For best flavor, wait 5-6 days before enjoying.