This onigiri recipe will teach you how to make authentic Japanese rice balls in just 5 minutes using simple ingredients.
These triangular-shaped snacks are perfect for lunch boxes, quick meals, or portable snacks.
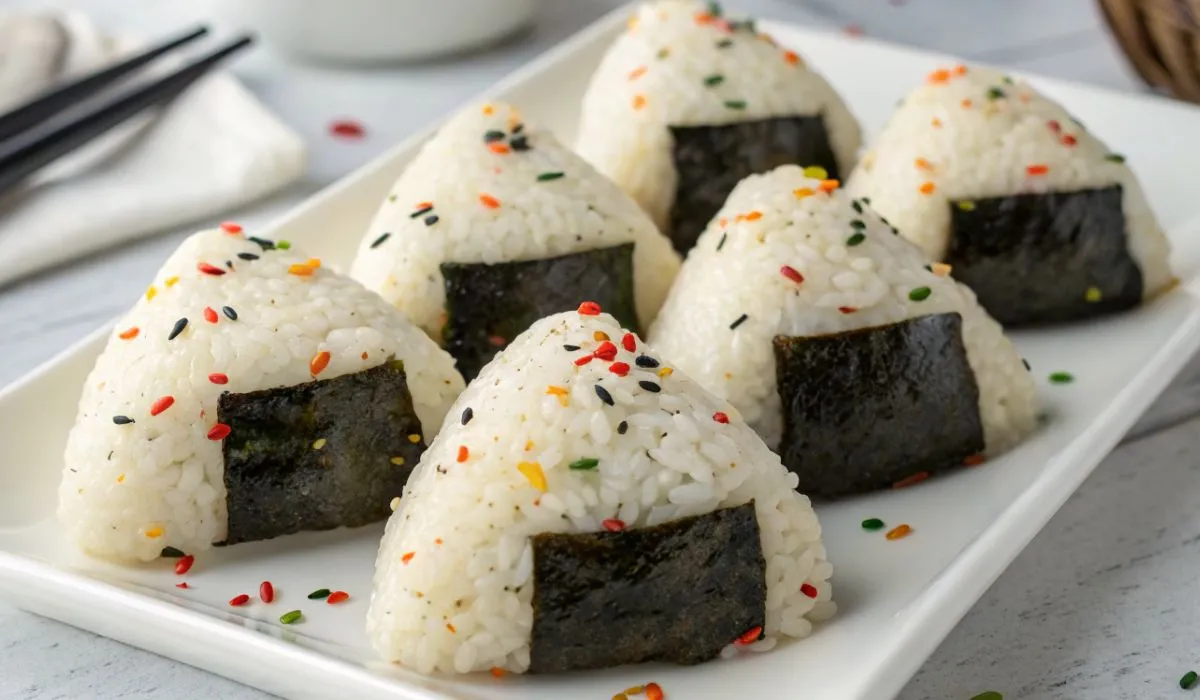
Made with seasoned sushi rice and wrapped in nori seaweed, onigiri offers endless flavor possibilities through various fillings and seasonings.
Whether you’re new to Japanese cooking or looking for a healthy grab-and-go option, this step-by-step guide makes it easy to create these beloved rice balls at home.

Why Japanese Rice Balls Are Perfect for Everyone
Japanese rice balls have become popular worldwide for good reasons:
- Portable and convenient – Easy to pack for work, school, or travel
- Customizable flavors – Add any filling or seasoning you like
- Budget-friendly ingredients – Uses basic pantry staples
- Healthy and filling – Provides sustained energy without heavy ingredients
- No cooking skills required – Simple hand-shaping technique anyone can master
- Versatile meal option – Works as breakfast, lunch, dinner, or snack
Essential Ingredients for Homemade Onigiri
The beauty of rice balls lies in their simplicity. Here’s what you need:
- Japanese short-grain rice – Koshihikari variety works best for proper stickiness
- Furikake rice seasoning – Adds flavor and visual appeal to your rice balls
- Nori seaweed sheets – Cut into strips for wrapping the bottom
- Salt – Mixed with water for hand preparation
- Water – Prevents rice from sticking to your hands
Optional Filling Ideas
Transform basic rice balls into flavor-packed treats:
- Salted salmon – Classic Japanese filling with omega-3 benefits
- Umeboshi pickled plum – Tangy and salty traditional option
- Tuna mayo – Popular modern variation with creamy texture
- Chicken karaage pieces – Crispy fried chicken for protein boost
- Pickled vegetables – Adds crunch and probiotics
Step-by-Step Onigiri Instructions
Making perfect rice balls requires the right technique. Follow these simple steps:
1. Prepare Your Workspace
- Cook 3 cups of short-grain rice using your preferred method
- Mix rice with furikake while still warm for even distribution
- Cut nori sheets into small rectangular strips
- Prepare salt water in a small bowl for hand dipping
2. Shape the Rice Balls
- Wet your hands with salt water to prevent sticking
- Take one handful of rice (about half a cup per ball)
- Add filling in center if using, then cover with more rice
- Form into triangle shape using fingertips and palm pressure
- Create small indentation on one side to show it’s handmade
- Wrap nori strip around the bottom, rough side touching rice
Pro Tips for Perfect Rice Balls Every Time
These expert techniques ensure success with your homemade onigiri:
- Use warm rice – Easier to shape than cold rice
- Apply gentle pressure – Avoid compacting too tightly
- Re-wet hands frequently – Prevents rice from sticking during shaping
- Work quickly – Shape while rice maintains optimal temperature
- Store nori separately – Add just before eating to prevent sogginess
Common Mistakes to Avoid
Learn from these frequent onigiri errors:
- Using long-grain rice – Doesn’t stick together properly
- Over-compacting – Creates dense, hard texture
- Dry hands – Causes rice to stick and tear
- Cold rice – Difficult to shape and doesn’t hold together
- Too much filling – Makes shaping impossible
Storage and Serving Suggestions
Maximize freshness and enjoyment of your rice balls:
- Eat immediately for best texture and flavor
- Store in refrigerator for maximum one day in airtight container
- Keep nori separate until ready to eat
- Serve at room temperature for optimal taste
- Pack in bento boxes for portable meals
Nutritional Benefits of Homemade Rice Balls
Understanding the health value helps you make informed choices:
- Complex carbohydrates – Provides steady energy release
- Low fat content – Naturally light and digestible
- Customizable nutrition – Add protein, vegetables, or healthy fats through fillings
- Portion control – Pre-portioned sizes help manage intake
- Mineral content – Seaweed provides iodine and other trace minerals
Flavor Variations to Try
Experiment with these seasoning combinations:
- Sesame salt (gomashio) – Nutty flavor with mineral benefits
- Bonito flake blend – Traditional umami-rich seasoning
- Spicy variations – Add shichimi togarashi for heat
- Herb combinations – Mix in dried herbs for unique flavors
Making onigiri at home connects you with Japanese food culture while providing practical meal solutions.
This simple technique produces satisfying results that rival store-bought versions.
Start with basic seasonings, then experiment with fillings and flavors that match your preferences.
With practice, you’ll develop the quick hand movements that make shaping effortless.
The key to great rice balls lies in using proper rice, maintaining the right temperature, and keeping your hands properly prepared.
Once you master these fundamentals, you can create countless variations to keep meals interesting and nutritious.
Easy Onigiri – Japanese Rice Balls
Ingredients
Equipment
Method
- Place the cooked sushi rice in a large mixing bowl while still warm. Add the furikake rice seasoning and mix through evenly until well distributed.
- Divide the seasoned rice into 6 equal portions, approximately one large handful for each onigiri.
- Fill a small bowl with water and add a pinch of salt. Wet your hands with the salt water and rub together. This prevents the rice from sticking to your hands.
- Take one portion of rice in your hands. If adding fillings, make a small indent in the center, place the filling inside, and fold the rice over to cover.
- Using your fingertips and palm, gently press and squeeze the rice into a triangular shape, rotating as you work. Create a small indentation on one face with your fingers to show it’s handmade.
- Place a strip of nori seaweed on the bottom of the onigiri with the rough side touching the rice. Fold it up towards the middle of the rice ball.
- Repeat the process with the remaining rice portions. Re-wet your hands with salt water as needed to prevent sticking.