Nothing beats the smell of fresh bread baking in your kitchen. This simple sandwich bread recipe creates two perfect loaves that are soft, fluffy, and ideal for everything from morning toast to afternoon sandwiches.
I’ve been perfecting this recipe for months, testing different ratios until I found the perfect balance. The result is a foolproof method that works every single time, even for beginners.

Why Make Your Own Sandwich Bread?
Store-bought bread often contains preservatives and additives you can’t pronounce. When you make bread at home, you control every ingredient. Plus, homemade bread tastes infinitely better than anything from the grocery store.
This recipe costs less than $2 to make two loaves. Compare that to premium bakery bread, and you’re saving serious money while getting superior quality.
What You’ll Need
The ingredients are simple and likely already in your pantry:
- 6 cups all-purpose flour – Use unbleached for best results
- 2 cups warm water – Keep it between 85-90°F
- 1/2 cup granulated sugar – Adds slight sweetness and feeds the yeast
- 1 1/2 tablespoons active dry yeast – Make sure it’s fresh
- 1/4 cup melted butter – This keeps the bread incredibly soft
- 1 tablespoon kosher salt – Enhances flavor and controls yeast activity
Step-by-Step Instructions
- Activate the Yeast – Combine warm water, yeast, and sugar in your stand mixer bowl. Whisk everything together and let it sit for 5 minutes. You should see bubbles forming on top. This tells you the yeast is alive and ready to work.
- Mix the Dough – Add melted butter and salt to the yeast mixture. Whisk to combine everything smoothly. Slowly add flour one cup at a time. Let your mixer knead the dough for 3-4 minutes using the dough hook. The dough will look slightly shaggy at this point, which is normal.
- First Rise – Turn the dough onto a clean surface and knead by hand for 1-2 minutes until smooth. Place it in an oiled bowl, cover with plastic wrap, and let it rise for one hour until doubled in size.
- Shape the Loaves – Preheat your oven to 375°F. Spray two 9×4 inch loaf pans with cooking spray. Divide the dough into two equal pieces. Press each piece into a rectangle about 9 inches wide. Roll it up tightly like a jelly roll and place seam-side down in the prepared pans.
- Second Rise – Cover the loaves with a clean kitchen towel. Let them rise for 45-60 minutes until the dough crests about half an inch above the pan rim.
- Bake to Perfection – Bake for 25-30 minutes, rotating the pans halfway through for even browning. The loaves should be golden brown on top and sound hollow when tapped. Cool in pans for 5 minutes, then turn out onto wire racks to cool completely before slicing.
Pro Tips for Success
- Test your yeast first. If you’re unsure about freshness, dissolve 1/2 teaspoon in warm water with a pinch of sugar. It should foam within 5 minutes.
- Create a warm rising environment. Turn your oven to 350°F for one minute, then turn it off. This creates the perfect warm, humid space for rising.
- Don’t rush the cooling. Hot bread slices poorly and gets gummy. Wait at least an hour before cutting.
- Use a bench scraper. This inexpensive tool makes dividing dough and cleaning your workspace much easier.
Storage and Freezing
Store your finished bread in an airtight container at room temperature for up to three days. For longer storage, slice the bread and freeze individual pieces for up to one month.
Frozen slices toast beautifully straight from the freezer. No thawing needed.
Troubleshooting Common Issues
- Dense bread usually means old yeast or water that was too hot. Keep water temperature between 85-90°F.
- Bread that doesn’t rise often indicates a cold kitchen. Use the warm oven trick mentioned above.
- Tough crust happens when bread bakes too long. Check for golden brown color and remove promptly.
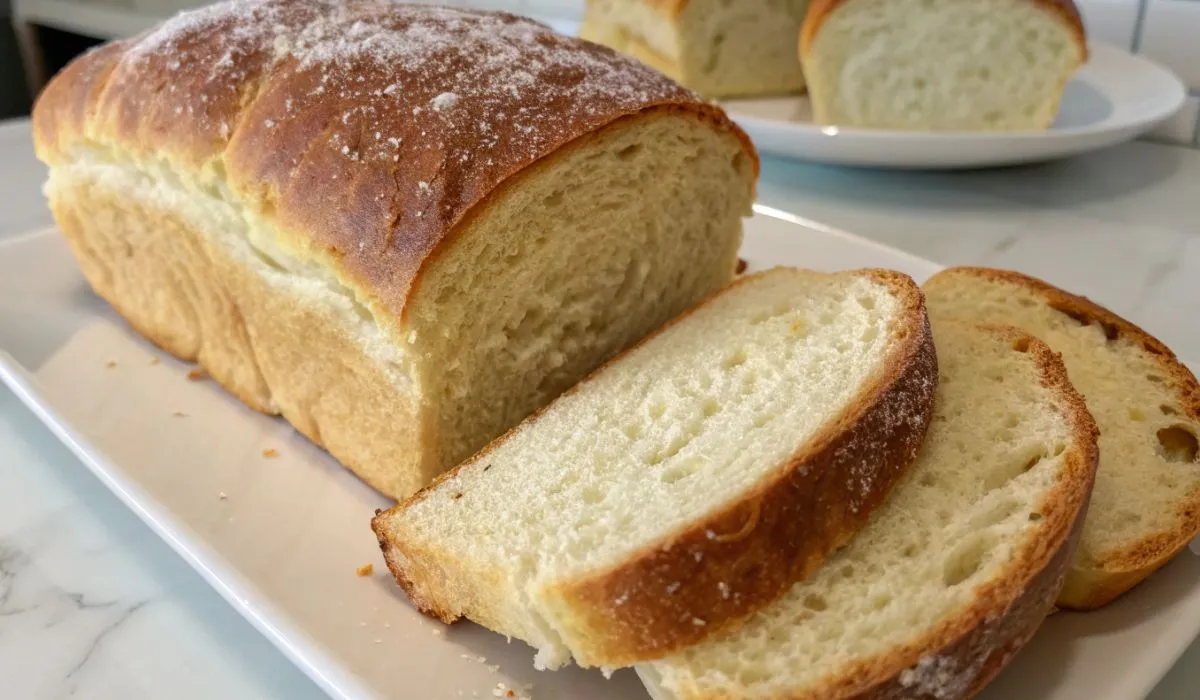
The Perfect Sandwich Bread
This recipe creates bread with a tender crumb and soft crust that’s perfect for sandwiches, toast, or eating plain with butter. The slight sweetness pairs well with both savory and sweet toppings.
Once you taste homemade sandwich bread, you’ll never want to buy store-bought again. The texture, flavor, and satisfaction of making it yourself can’t be matched.
Start this recipe on a weekend when you have a few hours to spare. The hands-on time is minimal, but the rising periods require patience. Trust the process, and you’ll be rewarded with two beautiful loaves of the best sandwich bread you’ve ever tasted.
Homemade Sandwich Bread
Ingredients
Equipment
Method
- Activate the Yeast: Combine warm water, yeast, and sugar in your stand mixer bowl. Whisk everything together and let it sit for 5 minutes. You should see bubbles forming on top, indicating the yeast is alive and ready to work.
- Mix the Dough: Add melted butter and salt to the yeast mixture. Whisk to combine everything smoothly. Slowly add flour one cup at a time. Let your mixer knead the dough for 3-4 minutes using the dough hook. The dough will look slightly shaggy at this point, which is normal.
- First Rise: Turn the dough onto a clean surface and knead by hand for 1-2 minutes until smooth. Place it in an oiled bowl, cover with plastic wrap, and let it rise for one hour until doubled in size.
- Shape the Loaves: Preheat your oven to 375°F. Spray two 9×4 inch loaf pans with cooking spray. Divide the dough into two equal pieces. Press each piece into a rectangle about 9 inches wide. Roll it up tightly like a jelly roll and place seam-side down in the prepared pans.
- Second Rise: Cover the loaves with a clean kitchen towel. Let them rise for 45-60 minutes until the dough crests about half an inch above the pan rim.
- Bake to Perfection: Bake for 25-30 minutes, rotating the pans halfway through for even browning. The loaves should be golden brown on top and sound hollow when tapped. Cool in pans for 5 minutes, then turn out onto wire racks to cool completely before slicing.
Notes
• Test your yeast first – dissolve 1/2 teaspoon in warm water with a pinch of sugar. It should foam within 5 minutes.
• Create a warm rising environment by turning your oven to 350°F for one minute, then turning it off.
• Don’t rush the cooling – hot bread slices poorly and gets gummy. Wait at least an hour before cutting.
• Use a bench scraper to make dividing dough and cleaning easier. Storage:
Store in an airtight container at room temperature for up to 3 days. For longer storage, slice and freeze individual pieces for up to one month. Frozen slices toast beautifully straight from the freezer.