Making kimchi at home changed my cooking forever. This spicy, tangy Korean side dish brings bold flavors to every meal. After years of perfecting this recipe, I’ll share the secrets to making restaurant-quality kimchi in your own kitchen.
What Makes Kimchi Special?
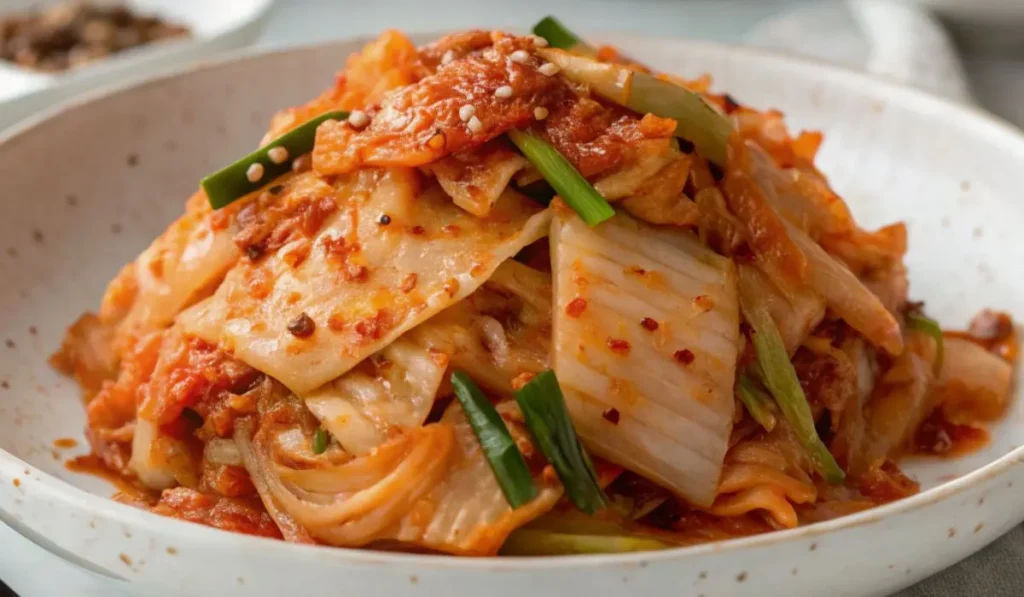
Kimchi is Korea’s beloved fermented vegetable dish. Most varieties use napa cabbage as the star ingredient. The fermentation process creates complex flavors that range from salty and spicy to sour and umami-rich.
This traditional food offers impressive health benefits. The fermentation process produces probiotics that support gut health. Korean families have been making kimchi for generations, and now you can join this delicious tradition.
Essential Ingredients for Perfect Kimchi
Main Ingredients:
- 4 kg napa cabbage (remove outer leaves)
- 16 cups water
- 1.5 cups Korean coarse sea salt
- 1/2 cup cooking salt
Kimchi Paste:
- 2 tbsp glutinous rice flour
- 1.5 cups gochugaru (Korean chili flakes)
- 540g Korean radish, julienned
- 3.5 tbsp Korean fish sauce
- 2 tbsp salted fermented shrimp
- 90g Korean chives, cut in 2-inch pieces
- 140g carrots, julienned
- 1/4 cup minced garlic
- 1/2 tbsp minced ginger
- 2 tbsp raw sugar
- 75g onion, blended
Step-by-Step Kimchi Making Process
- Prepare the Cabbage. Cut napa cabbage into quarters lengthwise. Keep the stem intact so leaves stay together. Rinse thoroughly under running water.
- Make Salt Water. Dissolve coarse salt in 16 cups of water in a large bowl. Dip each cabbage quarter in this saltwater.
- Salt the Leaves. Sprinkle additional cooking salt on the thick white parts of each leaf. This draws out moisture and seasons the cabbage.
- Start Brining. Place salted cabbage in a large food-grade plastic bag. Pour in the reserved saltwater. Seal the bag tightly.
- Pickle for 6 Hours. Let cabbage pickle for exactly 6 hours. Turn it upside down every 2 hours. This timing is crucial for perfect texture.
- Make Rice Paste. While cabbage pickles, mix glutinous rice flour with 1.5 cups water in a saucepan. Boil over medium heat for 5-8 minutes until thick. Let cool completely.
- Add Chili Flakes. Add Korean chili flakes to the cooled rice paste. Mix well. This creates the signature red color.
- Prepare Vegetable Mix. In a large bowl, combine radish with fine sea salt, fish sauce, and fermented shrimp. Let sit for 10 minutes.
- Make Kimchi Paste. Add chives, carrots, garlic, ginger, sugar, onion, and the chili paste mixture to the vegetable mix. Mix thoroughly.
- Rinse and Drain. After 6 hours, rinse pickled cabbage thoroughly. Drain in a colander for 1 hour to remove excess salt.
- Season the Cabbage. Place one cabbage quarter on a tray. Spread kimchi paste between each leaf. Use 1-2 small handfuls per quarter.
- Repeat Process. Season remaining cabbage quarters. Keep leaves attached to the stem for better structure.
Fermentation and Storage Tips
Transfer seasoned kimchi to an airtight container. Leave at room temperature for 24 hours. This starts the fermentation process.
Move to the refrigerator after 24 hours. Your kimchi is ready to eat when chilled. For deeper flavor, wait 3-4 more days.
Store kimchi in the refrigerator at 3-5 degrees Celsius. Use a stainless steel or BPA-free plastic container. Fill containers only 70-80% full to prevent overflow.
Properly stored kimchi lasts several months in the refrigerator. Some batches stay fresh for up to a year with ideal storage conditions.
Common Mistakes to Avoid
Don’t skip the brining time. Six hours is the sweet spot for perfect texture and flavor. Shorter brining leads to bland kimchi that spoils quickly.
Avoid over-salting during the initial brining. There’s no fixing overly salty kimchi. Follow measurements precisely.
Don’t substitute Korean ingredients if possible. Gochugaru and Korean fish sauce create authentic flavors. Other chili flakes and fish sauces change the taste significantly.
Serving Your Homemade Kimchi
Fresh kimchi works perfectly as a side dish. Serve small portions with rice, grilled meats, or Korean barbecue. The tangy flavor cuts through rich foods beautifully.
Aged kimchi becomes ideal for cooking. Use it in kimchi fried rice, kimchi stew, or kimchi pancakes. The sour notes add depth to cooked dishes.
Final Thoughts
Making kimchi requires patience, but the results are worth every minute. Start with quality ingredients and follow the timing carefully. Your homemade kimchi will rival any restaurant version.
This recipe creates enough kimchi to last months. Share with friends and family to spread the joy of this incredible Korean treasure.

Traditional Korean Kimchi
Ingredients
Equipment
Method
- Cut napa cabbage into quarters lengthwise. Keep the stem intact so leaves stay together. Rinse thoroughly under running water.
- Dissolve coarse salt in 16 cups of water in a large bowl. Dip each cabbage quarter in this saltwater.
- Sprinkle additional cooking salt on the thick white parts of each leaf. This draws out moisture and seasons the cabbage.
- Place salted cabbage in a large food-grade plastic bag. Pour in the reserved saltwater. Seal the bag tightly.
- Let cabbage pickle for exactly 6 hours. Turn it upside down every 2 hours. This timing is crucial for perfect texture.
- While cabbage pickles, mix glutinous rice flour with 1.5 cups water in a saucepan. Boil over medium heat for 5-8 minutes until thick. Let cool completely.
- Add Korean chili flakes to the cooled rice paste. Mix well. This creates the signature red color.
- In a large bowl, combine radish with fine sea salt, fish sauce, and fermented shrimp. Let sit for 10 minutes.
- Add chives, carrots, garlic, ginger, sugar, onion, and the chili paste mixture to the vegetable mix. Mix thoroughly.
- After 6 hours, rinse pickled cabbage thoroughly. Drain in a colander for 1 hour to remove excess salt.
- Place one cabbage quarter on a tray. Spread kimchi paste between each leaf. Use 1-2 small handfuls per quarter.
- Season remaining cabbage quarters. Keep leaves attached to the stem for better structure.
- Transfer kimchi to airtight containers. Leave at room temperature for 24 hours, then refrigerate.
- Kimchi is ready to eat when chilled. For deeper flavor, wait 3-4 more days before serving.