Making your own sourdough starter recipe is the first step to creating delicious homemade bread with that signature tangy flavor. This wild yeast culture takes just a few ingredients and about 7-10 days to develop into a robust starter that will last for years.
A healthy sourdough starter opens the door to countless baking possibilities. You can make crusty artisan bread, fluffy pancakes, chewy bagels, and even sourdough pizza dough. The natural fermentation process creates complex flavors that store-bought yeast simply cannot match.
What Makes Sourdough Starter Special
Sourdough starter is a living culture of wild yeast and beneficial bacteria that offers unique benefits:
- Natural fermentation captures wild yeasts from the environment
- Complex flavors develop through lactic acid bacteria growth
- Better digestibility as fermentation breaks down proteins and starches
- No commercial yeast needed for authentic artisan bread
- Improved shelf life due to natural preservation from acidity
- Nutritional benefits from the fermentation process
Many people who struggle with gluten sensitivity find sourdough more tolerable, though it does not eliminate gluten completely.
Essential Ingredients for Your Starter
Creating a sourdough culture requires only two basic ingredients:
- All-purpose flour (6 cups) – Forms the base of your starter
- Whole wheat flour (3 cups) – Boosts fermentation with extra nutrients
- Water – Use filtered, bottled, or dechlorinated tap water
The flour mixture combines all-purpose and whole wheat flour for optimal results. Whole wheat flour contains more nutrients and wild yeasts that speed up the fermentation process. Store this mixture in an airtight container for daily feedings.
For water, avoid chlorinated tap water as it can inhibit yeast growth. If using tap water, let it sit uncovered for 24 hours to allow chlorine to evaporate.
Tools You Need for Success
Proper equipment makes maintaining your starter much easier:
- Glass jar – Mason jars or food-grade containers work best
- Kitchen scale – Ensures accurate measurements for consistent results
- Mixing spoon – For combining ingredients thoroughly
- Breathable cloth – Cheesecloth or kitchen towels for covering
- Rubber bands – To mark starter levels and secure covers
A kitchen scale is especially important for measuring ingredients by weight rather than volume. This precision helps maintain the right hydration levels for healthy fermentation.
Step-by-Step Instructions
Day 1: Create the Base
Start your fermentation process with these simple steps:
- Mix 1 cup flour mixture with 1/2 cup water in your clean jar
- Stir until no dry flour remains
- Consistency should look like thick pancake batter
- Cover with breathable cloth
- Place in warm spot around 75°F
Day 2: First Stirring
Monitor your starter’s early development:
- Give mixture a gentle stir after 24 hours
- Look for small bubbles forming
- Note any changes in smell or appearance
- Cover and let rest another 24 hours
Days 3-7: Daily Feeding Routine
Maintain consistent feeding schedule for healthy growth:
- Remove all but 2 tablespoons of starter from jar
- Add 1/2 cup fresh flour mixture
- Add 1/4 cup water
- Stir thoroughly until well combined
- Cover and place in warm location
- Repeat every 24 hours at the same time
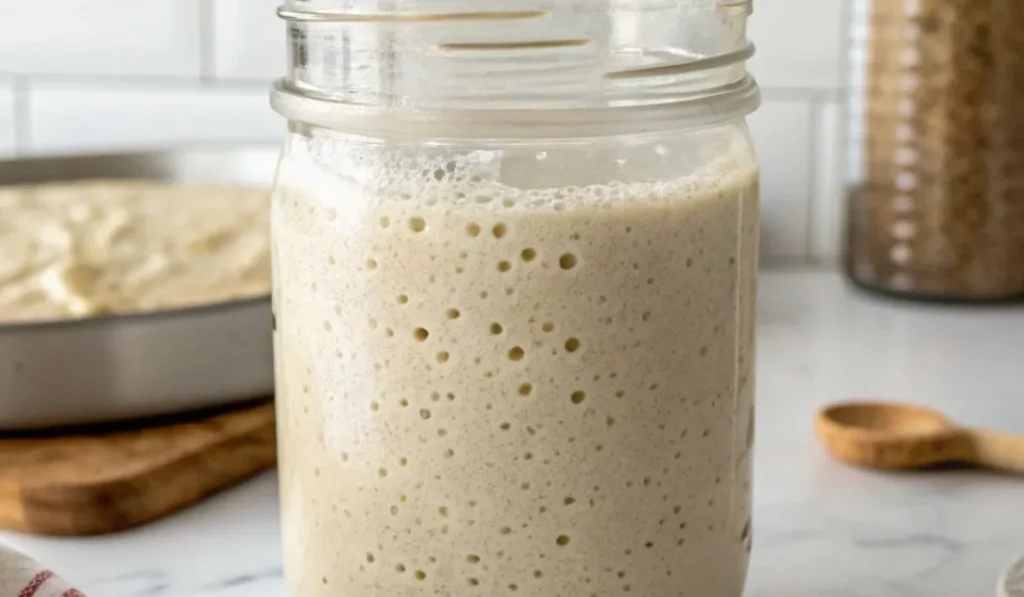
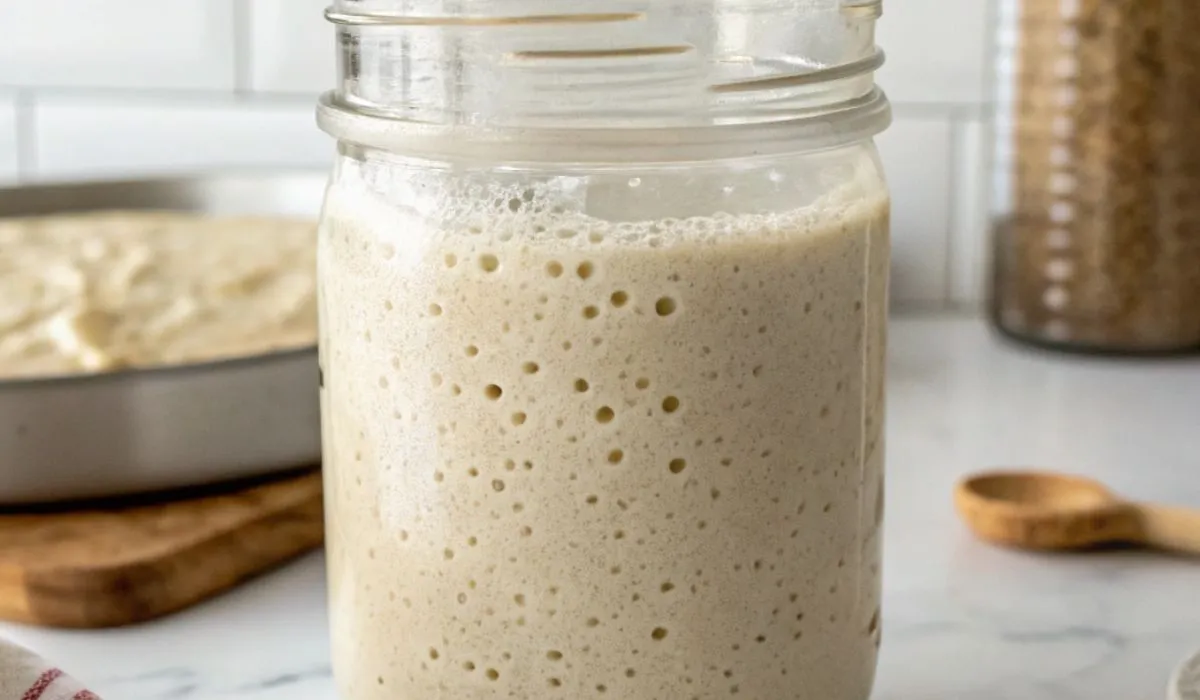
The starter should become increasingly active with more bubbles and a pleasant, tangy smell.
Signs Your Starter Is Ready
A mature sourdough starter shows several clear indicators:
- Doubles in size within 4-12 hours after feeding
- Bubbles actively on surface and sides of container
- Passes float test when dropped in water
- Smells tangy but not unpleasantly sour
- Maintains consistency for several consecutive feedings
The float test is reliable for checking readiness. Drop a spoonful of active starter into water. If it floats, the starter has enough gas production for baking bread.
Troubleshooting Common Issues
Sluggish Starter Solutions:
When your starter needs extra help to become active:
- Add extra feeding between regular meals
- Mix 2 tablespoons flour with 2 teaspoons water
- Feed 12 hours after regular daily feeding
- Continue until starter shows consistent activity
- Check temperature conditions
Temperature Management:
Create the right environment for fermentation:
- Cold kitchens: Find warm spots near oven or on refrigerator top
- Use heating pad: Set on low with towel barrier
- Hot environments: Move to cooler location or use cold water
- Ideal range: Maintain 75-80°F for best results
- Monitor daily: Adjust location based on seasonal changes
Maintaining Your Active Starter
Keep your sourdough culture healthy with proper maintenance:
- Feed daily for first two weeks after establishment
- Use consistent schedule at same time each day
- Maintain proper ratios of flour to water
- Watch for activity signs before each feeding
- Keep container clean to prevent contamination
After two weeks, you can refrigerate your starter between uses. Take it out several hours before baking to bring it back to room temperature and activity.
Making the Most of Discard
Transform your excess starter into delicious recipes:
- Pancakes and waffles for weekend breakfast
- Crackers and flatbreads for healthy snacking
- Pizza dough for quick weeknight meals
- Muffins and quick breads for sweet treats
- Sourdough focaccia for dinner sides
Save the removed starter in a refrigerator container instead of throwing it away. These discard recipes help reduce waste while expanding your baking options.
Your Sourdough Journey Begins
Creating a sourdough starter from scratch takes patience but rewards you with years of delicious baking. This natural fermentation process connects you to traditional bread-making methods used for thousands of years.
Start your wild yeast culture today and discover the satisfaction of baking truly homemade bread. Your active starter will become a living ingredient that improves with age and care.
Easy Sourdough Starter Recipe
Ingredients
Equipment
Method
- Prepare Flour Mixture: Mix 6 cups all-purpose flour with 3 cups whole wheat flour in an airtight container. This will be your feeding mixture for the entire process.
- Day 1 – Create Base: In a clean glass jar, mix 1 cup flour mixture with 1/2 cup water (120g each). Stir thoroughly until no dry flour remains and mixture resembles thick pancake batter. Cover with breathable cloth secured with rubber band. Place in warm location around 75°F.
- Day 2 – First Stir: After 24 hours, give the mixture a gentle stir to incorporate air. Look for small bubbles forming, which indicates fermentation is beginning. Cover and let rest another 24 hours in warm spot.
- Days 3-7 – Daily Feeding: Every 24 hours at the same time, discard all but 2 tablespoons of starter. Add 1/2 cup fresh flour mixture and 1/4 cup water (60g each). Mix thoroughly until well combined. Cover and place in warm location.
- Monitor Progress: Repeat daily feeding for 7-10 days until starter consistently doubles in size within 4-12 hours after feeding, shows active bubbling, and has pleasant tangy aroma.
- Test Readiness: Perform float test by dropping small amount of active starter into water. If it floats, starter is ready for baking. If it sinks, continue daily feedings for few more days.
- Establish Strength: Continue daily feeding for first two weeks after starter becomes active to build robust yeast and bacteria population for consistent baking results.
Notes
- If starter seems sluggish after day 4, add extra feeding (2 tbsp flour + 2 tsp water) 12 hours after regular feeding
- Cold kitchens slow fermentation but don’t prevent it – find warm spots or use heating pad on lowest setting
- Save discarded starter in fridge for pancakes, waffles, crackers, and other recipes
- Use filtered, bottled, or dechlorinated tap water (let tap water sit uncovered 24 hours)
- Starter should smell tangy and pleasant, not putrid or alcoholic