Ingredients
Equipment
Method
- Prepare Flour Mixture: Mix 6 cups all-purpose flour with 3 cups whole wheat flour in an airtight container. This will be your feeding mixture for the entire process.
- Day 1 - Create Base: In a clean glass jar, mix 1 cup flour mixture with 1/2 cup water (120g each). Stir thoroughly until no dry flour remains and mixture resembles thick pancake batter. Cover with breathable cloth secured with rubber band. Place in warm location around 75°F.
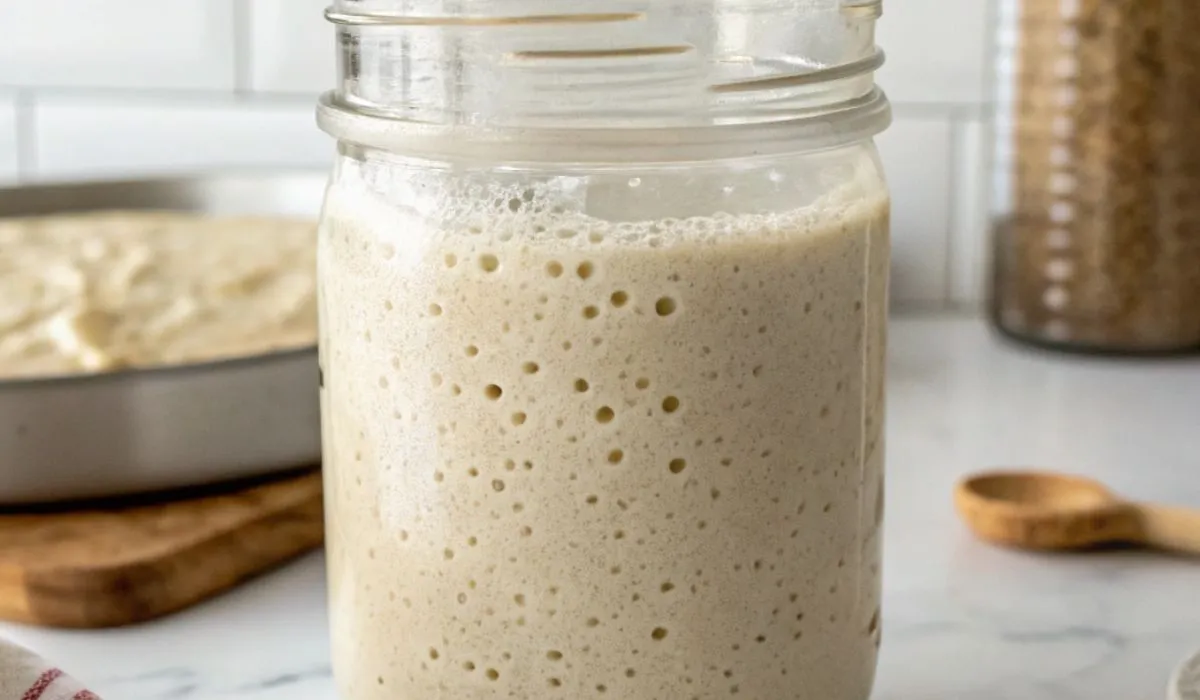
- Day 2 - First Stir: After 24 hours, give the mixture a gentle stir to incorporate air. Look for small bubbles forming, which indicates fermentation is beginning. Cover and let rest another 24 hours in warm spot.
- Days 3-7 - Daily Feeding: Every 24 hours at the same time, discard all but 2 tablespoons of starter. Add 1/2 cup fresh flour mixture and 1/4 cup water (60g each). Mix thoroughly until well combined. Cover and place in warm location.
- Monitor Progress: Repeat daily feeding for 7-10 days until starter consistently doubles in size within 4-12 hours after feeding, shows active bubbling, and has pleasant tangy aroma.
- Test Readiness: Perform float test by dropping small amount of active starter into water. If it floats, starter is ready for baking. If it sinks, continue daily feedings for few more days.
- Establish Strength: Continue daily feeding for first two weeks after starter becomes active to build robust yeast and bacteria population for consistent baking results.
Notes
Troubleshooting Tips:
- If starter seems sluggish after day 4, add extra feeding (2 tbsp flour + 2 tsp water) 12 hours after regular feeding
- Cold kitchens slow fermentation but don't prevent it - find warm spots or use heating pad on lowest setting
- Save discarded starter in fridge for pancakes, waffles, crackers, and other recipes
- Use filtered, bottled, or dechlorinated tap water (let tap water sit uncovered 24 hours)
- Starter should smell tangy and pleasant, not putrid or alcoholic